Google Tag Manager の追加
Web サイトを運営する際には、様々なツールを活用することが求められます。これらのツールを利用する際には、Meta データや JavaScript をサイトに適用する必要が生じることがあります。もちろん、CMS を使用して管理することも可能ですが、Google Tag Manager のような汎用的なツールを利用することで、より柔軟かつ効率的な運用が実現できます。
このドキュメントでは、Google Tag Manager を Next.js のプロジェクトに適用する際の手順を紹介します。
Next.js Pages Router
ここでは Next.js Page Router を利用する際のサンプルを紹介します。なお、公式サイトでも同様の手順が紹介されていますので、最新情報は Next.js のサイトをご覧ください。
それでは、サンプルのプロジェクトを作成していきます。
-
Next.js のプロジェクトを作成します。
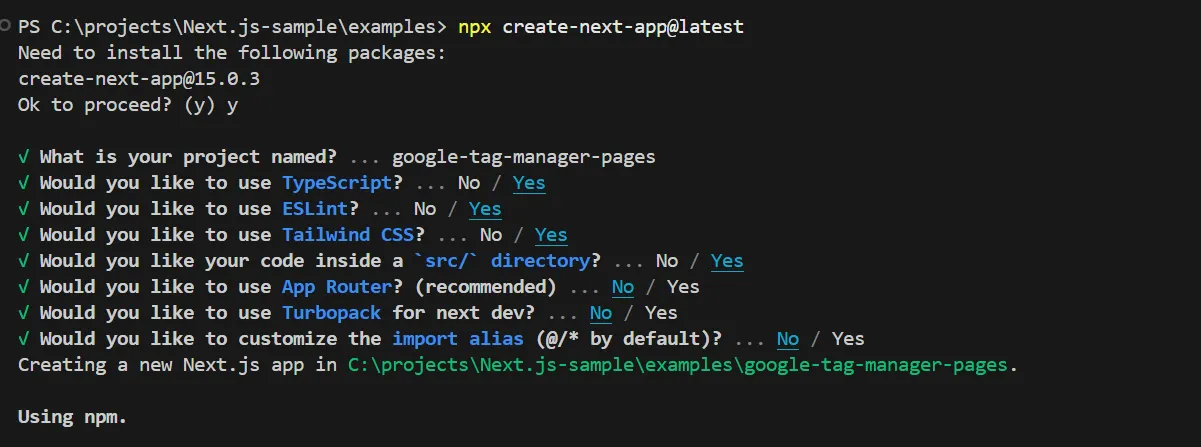
Terminal window npx create-next-app@latestいくつかの選択肢に関しては、以下のように回答をして Pages Router のプロジェクトを作成しました。

-
続いて、今回利用するパッケージ
@next/third-parties@latestをインストールします。Terminal window npm install @next/third-parties@latest -
全体で利用できるようにするために、
/pages/_app.tsxにコードを追加します。/pages/_app.tsx import '@/styles/globals.css';import type { AppProps } from 'next/app';import { GoogleTagManager } from '@next/third-parties/google';export default function App({ Component, pageProps }: AppProps) {return (<><Component {...pageProps} /><GoogleTagManager gtmId="GTM-XYZ" /></>);} -
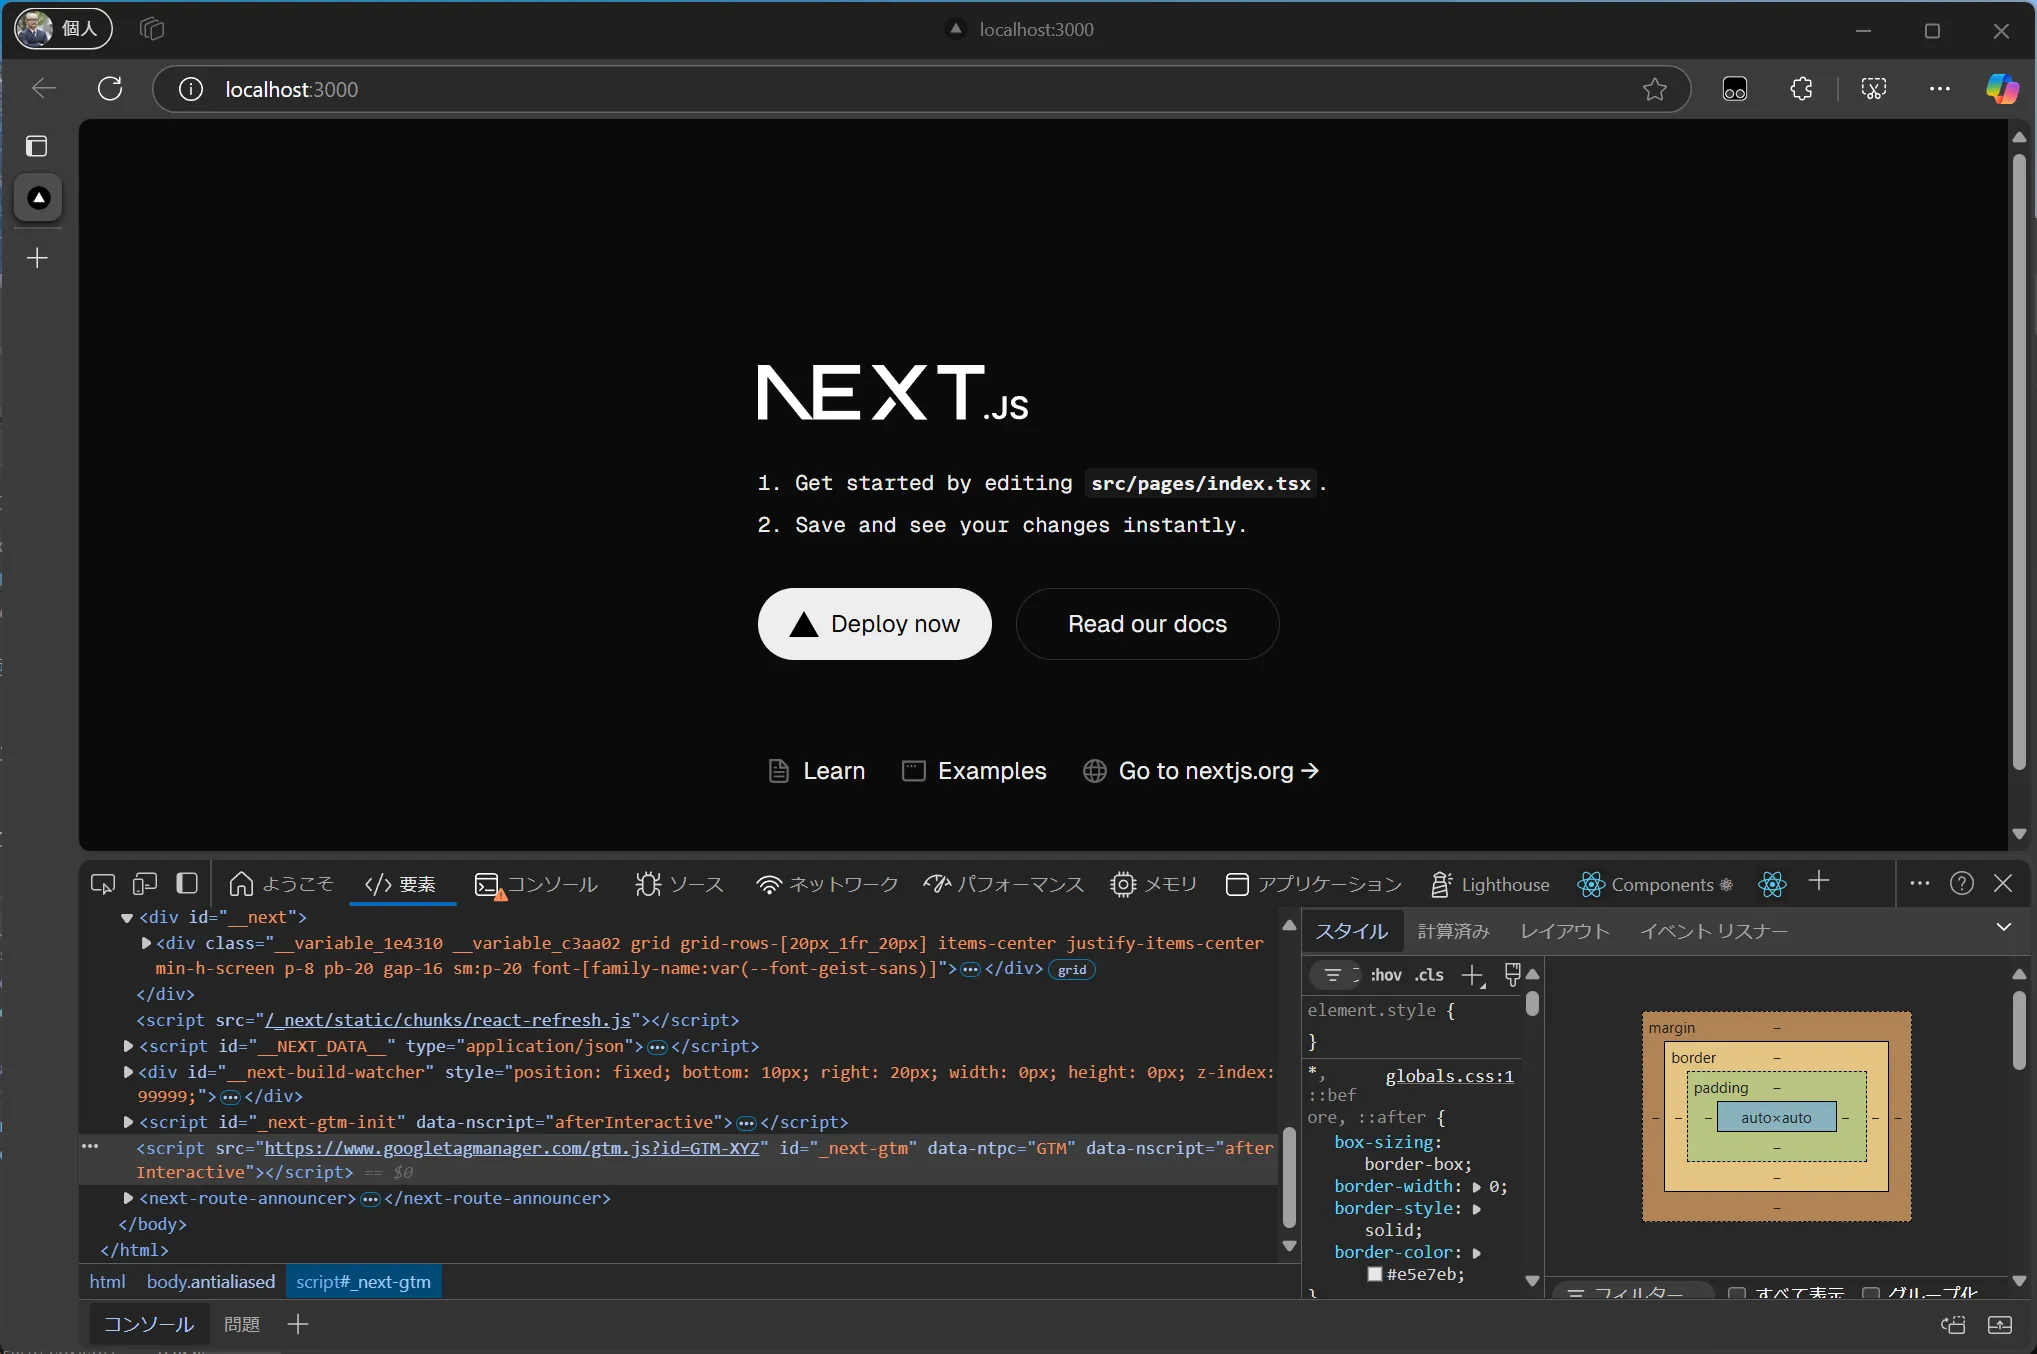
実際に起動すると、 Google Tag Manager のコードが追加されていることを確認することができました。

-
GTM のキーに関して環境変数で管理をするために、
.env.localのファイルを作成して以下のように記述します。/.env.local NEXT_PUBLIC_GOOGLE_TAG_MANAGER=<your API key here> -
.env.local に記述したキーを読み込むために、以下のファイルを書き換えます。
/pages/_app.tsx export default function App({ Component, pageProps }: AppProps) {return <><Component {...pageProps} /><GoogleTagManager gtmId={process.env.NEXT_PUBLIC_GOOGLE_TAG_MANAGER || ""} /></>
上記で紹介をしたサンプルのコードは、以下のリポジトリから参照することができます。
Next.js App Router
ここでは Next.js App Router を利用する際のサンプルを紹介します。なお、公式サイトでも同様の手順が紹介されていますので、最新情報は Next.js のサイトをご覧ください。
-
Next.js のプロジェクトを作成します。
Terminal window npx create-next-app@latestいくつかの選択肢に関しては、以下のように回答をして Pages Router のプロジェクトを作成しました。

-
続いて、今回利用するパッケージ
@next/third-parties@latestをインストールします。Terminal window npm install @next/third-parties@latest -
全体で利用できるようにするために、
/app/layout.tsxにコードを追加します。/app/layout.tsx import { GoogleTagManager } from '@next/third-parties/google';import type { Metadata } from 'next';import localFont from 'next/font/local';import './globals.css';const geistSans = localFont({src: './fonts/GeistVF.woff',variable: '--font-geist-sans',weight: '100 900',});const geistMono = localFont({src: './fonts/GeistMonoVF.woff',variable: '--font-geist-mono',weight: '100 900',});export const metadata: Metadata = {title: 'Create Next App',description: 'Generated by create next app',};export default function RootLayout({children,}: Readonly<{children: React.ReactNode;}>) {return (<html lang="en"><GoogleTagManager gtmId="GTM-XYZ" /><body className={`${geistSans.variable} ${geistMono.variable} antialiased`}>{children}</body></html>);} -
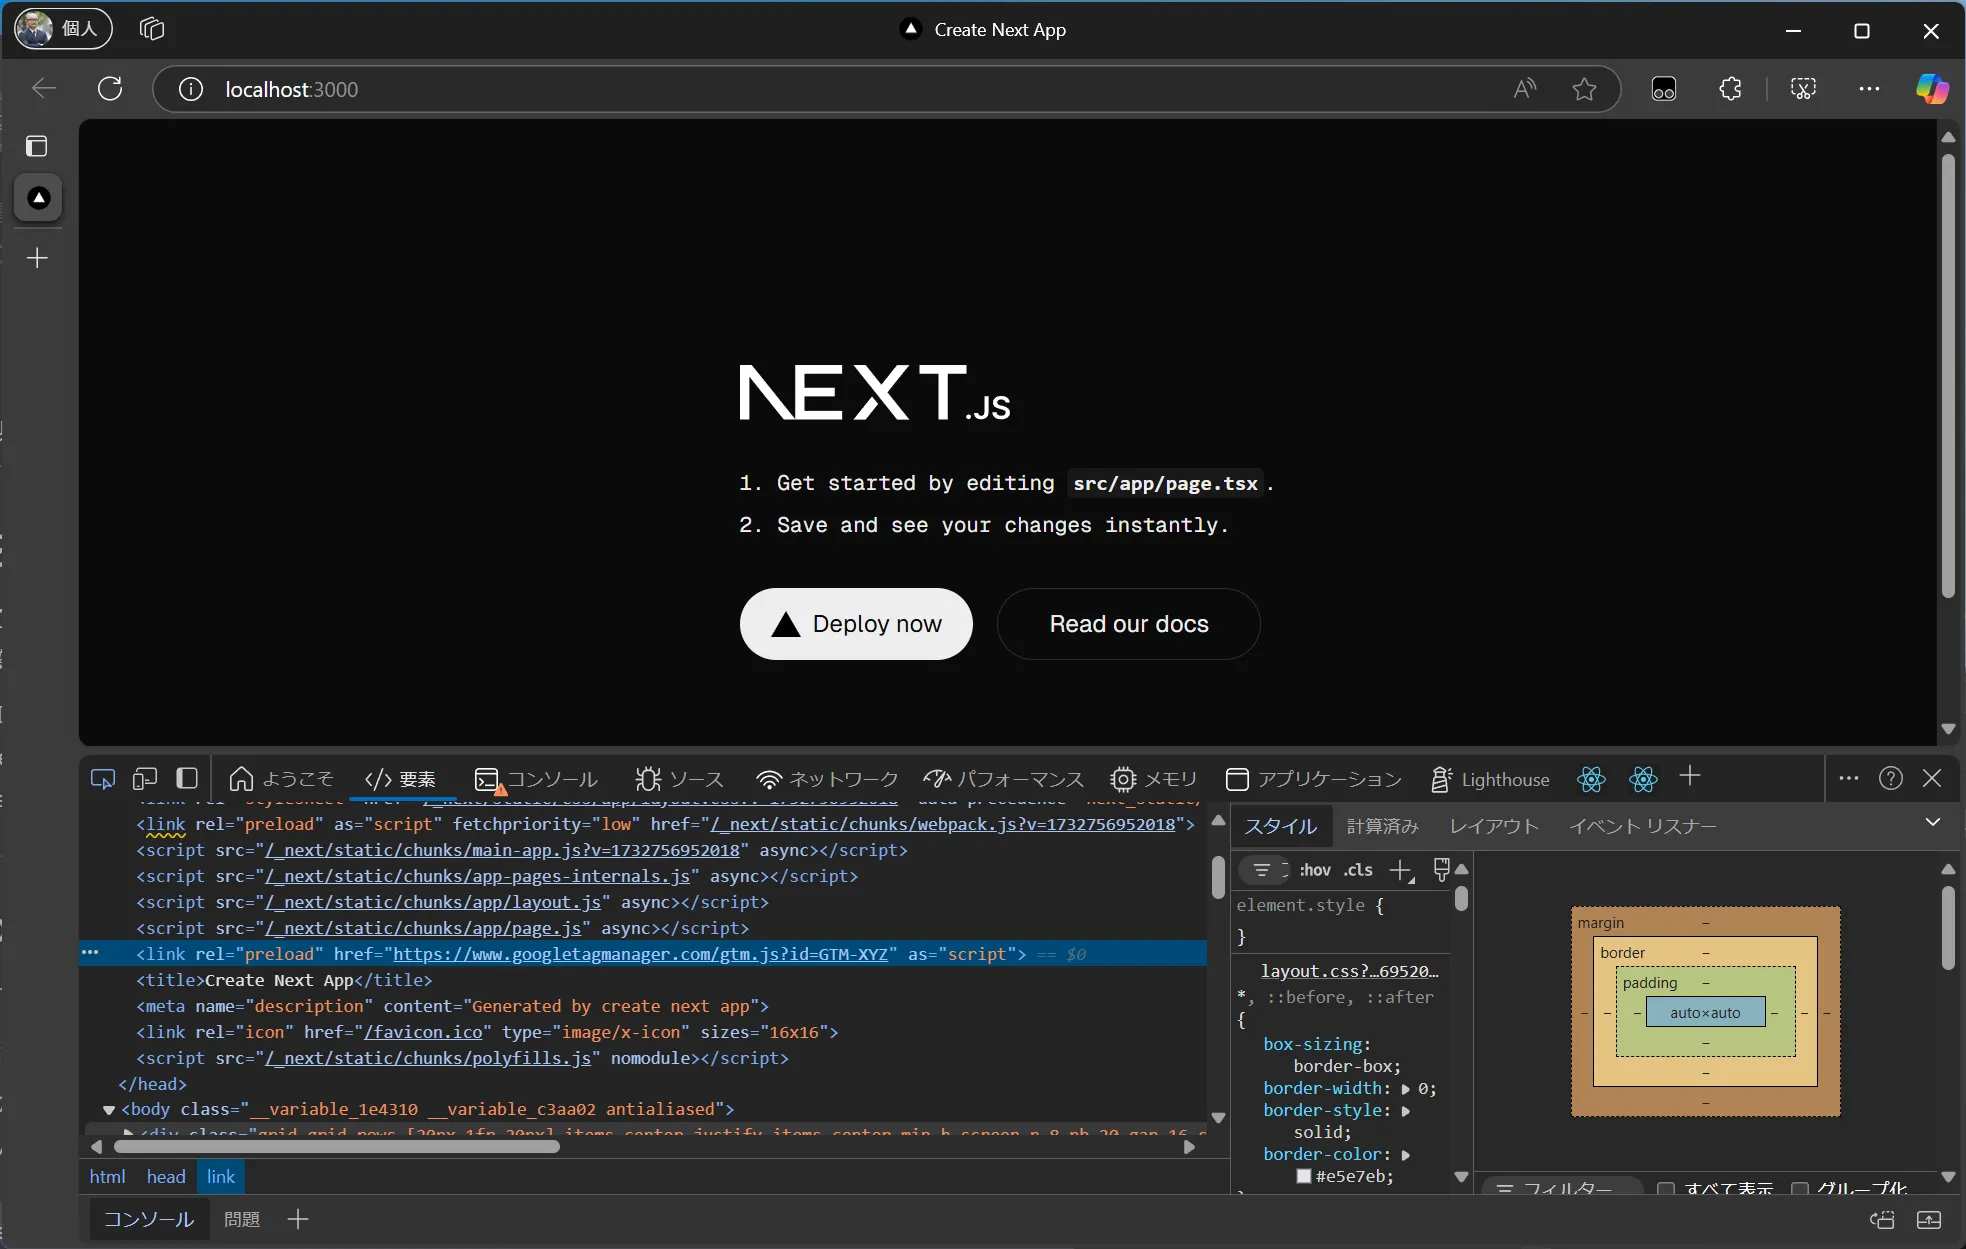
実際に起動すると、 Google Tag Manager のコードが追加されていることを確認することができました。

-
GTM のキーに関して環境変数で管理をするために、
.env.localのファイルを作成して以下のように記述します。/.env.local NEXT_PUBLIC_GOOGLE_TAG_MANAGER=<your API key here> -
.env.local に記述したキーを読み込むために、以下のファイルを書き換えます。
/app/layout.tsx return (<html lang="en"><GoogleTagManager gtmId={process.env.NEXT_PUBLIC_GOOGLE_TAG_MANAGER || ""} /><bodyclassName={`${geistSans.variable} ${geistMono.variable} antialiased`}>{children}
上記で紹介をしたサンプルのコードは、以下のリポジトリから参照することができます。
その他の実装
以前にブログで紹介をしていた Next.js での GTM の実装ですが、react-gtm-module というパッケージを利用していました。
上記以外にも GTM と連携させるためのパッケージが提供されていますが、今は Next.js が提供している手順が一番シンプルですので、この実装に関しては省略させていただきます。
まとめ
Google Tag Manager の実装に関しては、すでに Next.js での実装手順が公式ドキュメントで提供されている形です。このドキュメントだけではなく、公式の手順を参照していただければと思います。