Using Document Extractor
Document Extractor refers to tools or processes that extract specific information or data from documents or files. This technology is used to efficiently obtain information, saving the effort of manual data extraction.
Three Types of Extractors
Sitecore Search offers three types of extraction tools for crawler settings: Document Extractor, Locale Extractor, and Request Extractor.
Document Extractor
Document Extractor creates indexed documents from the content URLs or documents of a website. Its main roles are as follows:
- Text Extraction Reads text data from documents and outputs it in a structured format (e.g., JSON or CSV).
- Keyword Extraction Extracts specified keywords or important phrases from documents.
- Structured Data Extraction Extracts itemized data (e.g., amount, date, name) from documents with specific formats such as receipts or invoices.
- Multilingual Support Supports multiple languages, including Japanese, for accurate extraction.
Document Extractor settings include four patterns: XPath, JavaScript, JSONPath, and PDF content.
This document uses XPath to operate the Document Extractor.
Locale Extractor
You can index localized content using some Sitecore Search sources. To index localized content, extract the locale of content items such as English-US (en-US) or Japanese (ja-JP) and generate a common ID for localized versions of the same content.
Locale Extractor is introduced in a separate document.
Request Extractor
Creates an additional URL list for the crawler to crawl. Use Request Extractor if the crawler has not reached all the content that needs to be indexed from the initial trigger.
Haramizu.com
This time, we will use the content of this site to obtain data with the crawler. The data to be crawled is managed as a Source. Click the third icon from the bottom on the left side of the management screen. Initially, no sources are included as shown below.
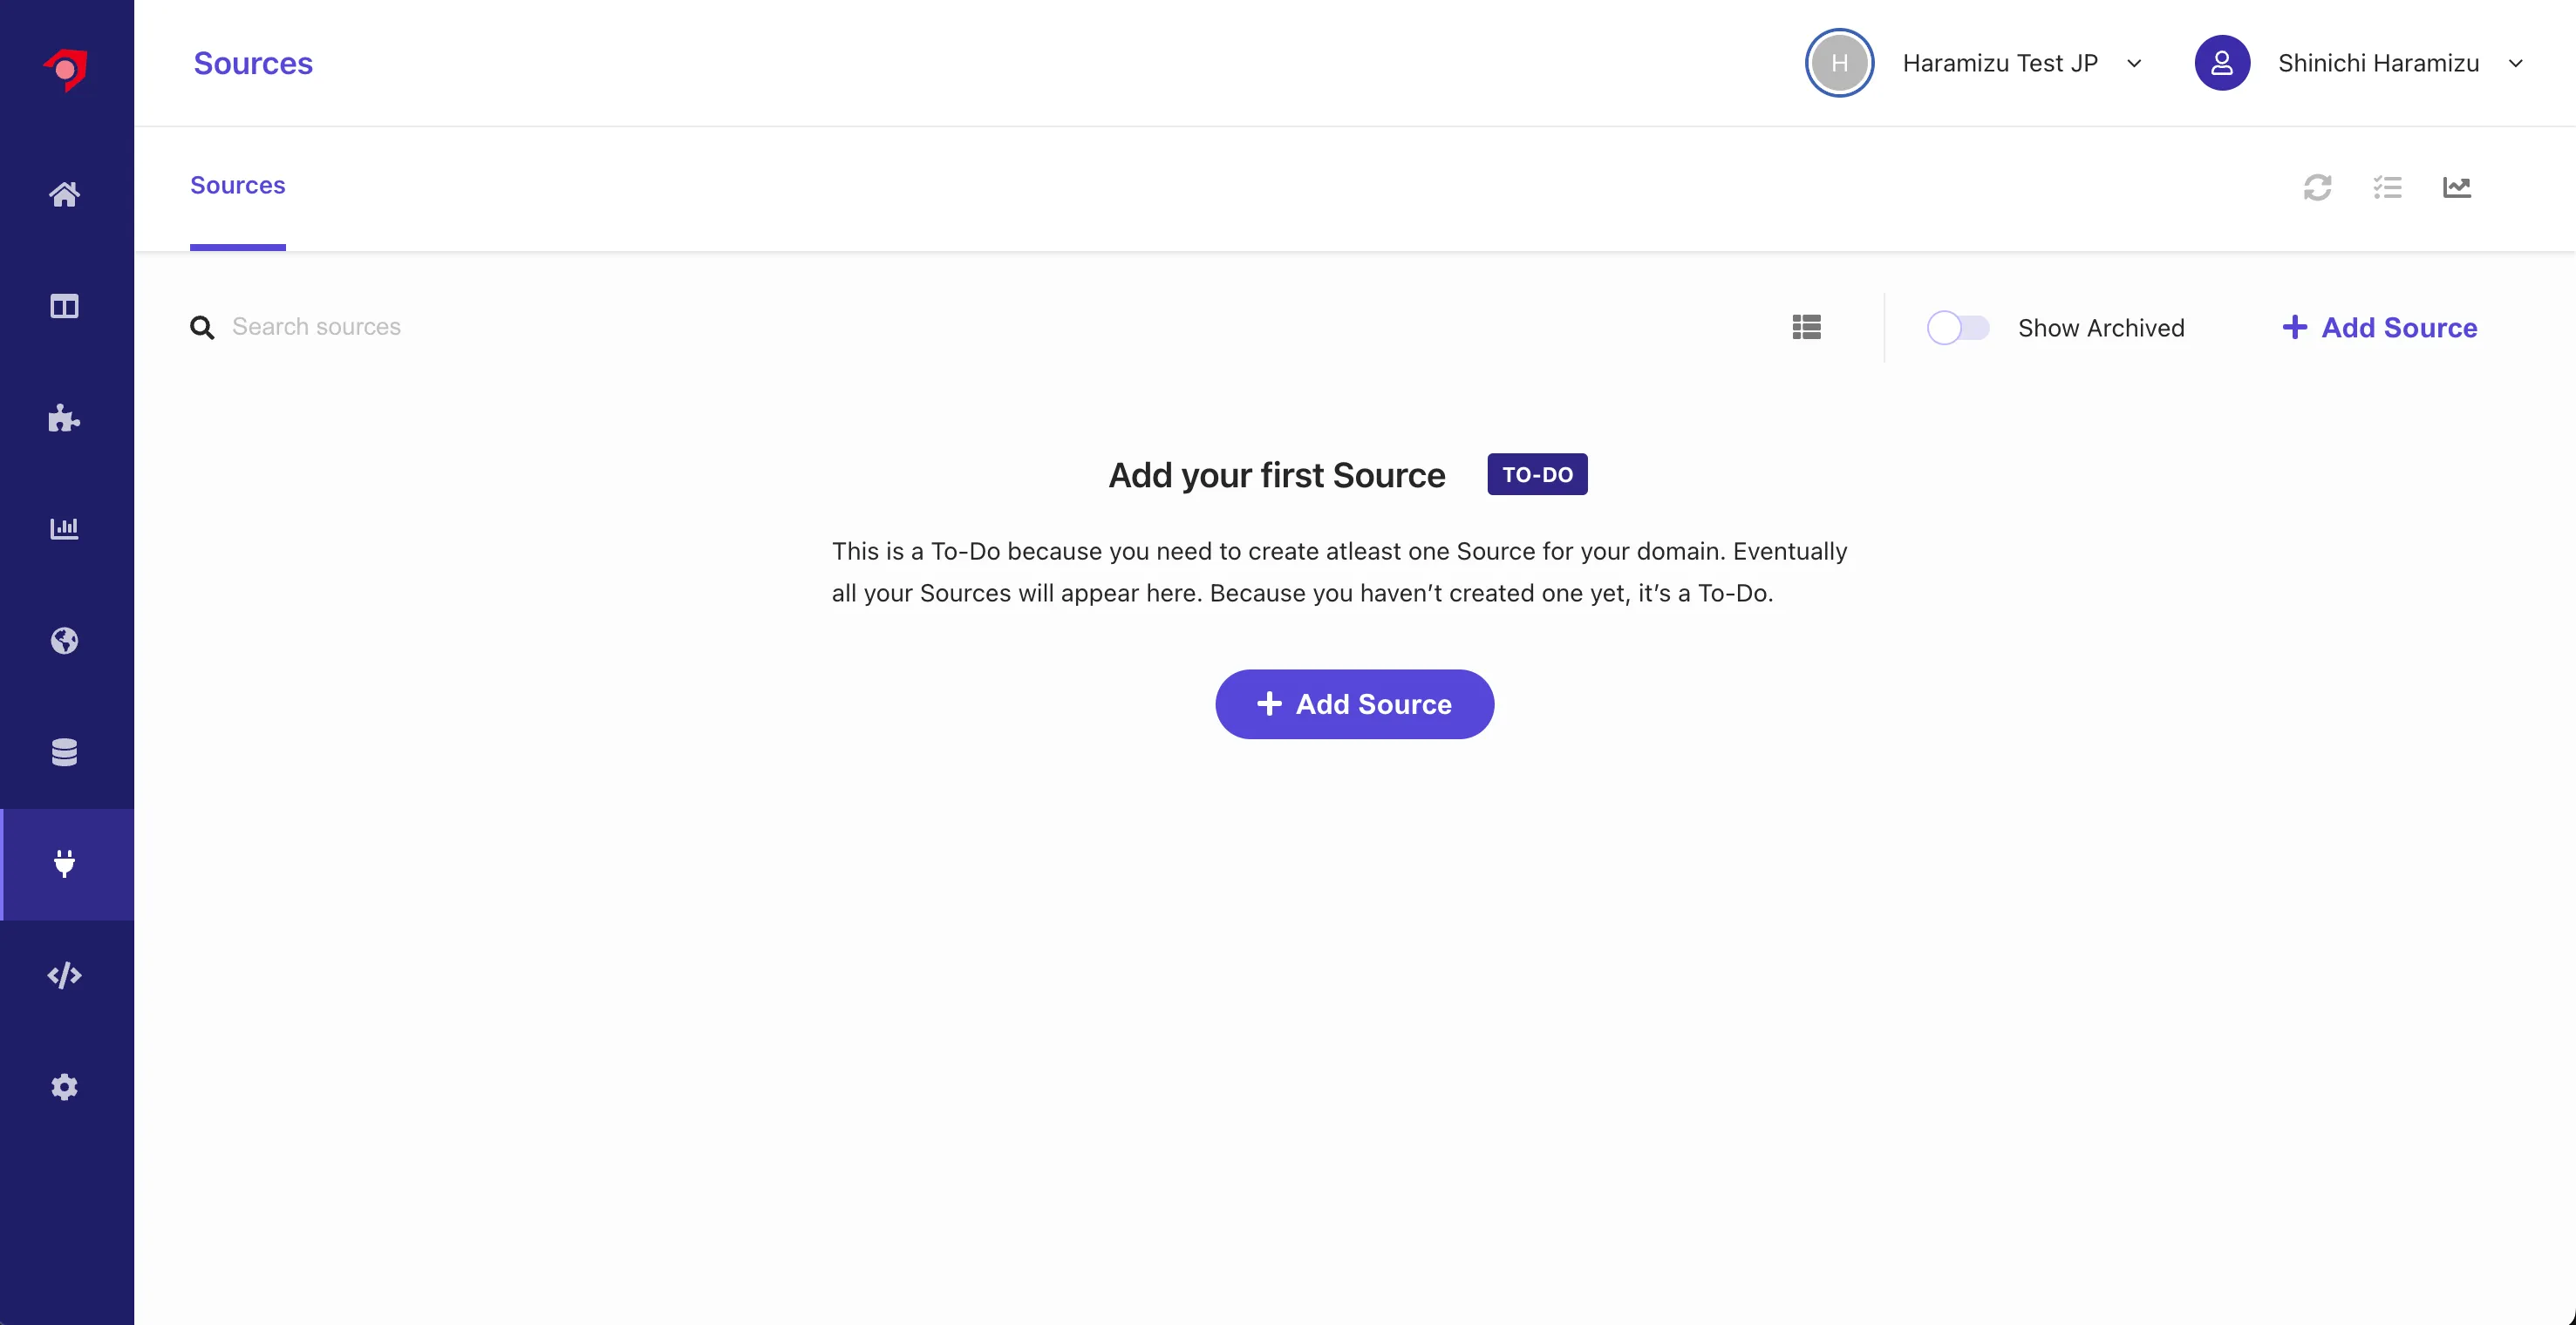
Creating a Source
Here, we will create a new Source to obtain data.
-
Click the
+ Add Sourcebutton to add a new source. -
Enter
Source nameandDescription, and specifyWeb Crawler (Advanced)for the Connector.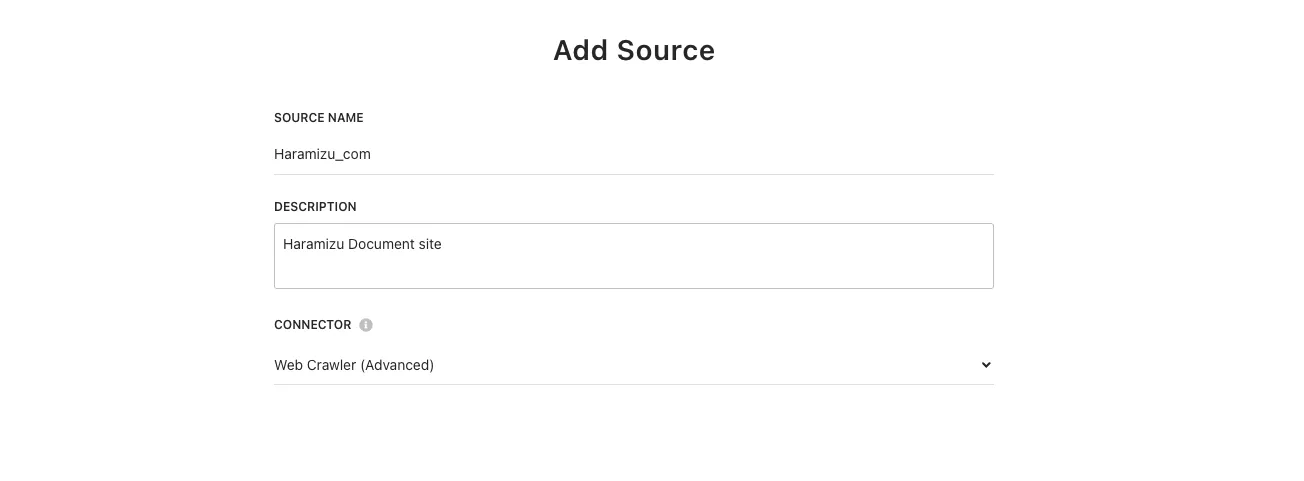
After completing the settings, click the
Savebutton. -
The settings screen for the new Source will be displayed.
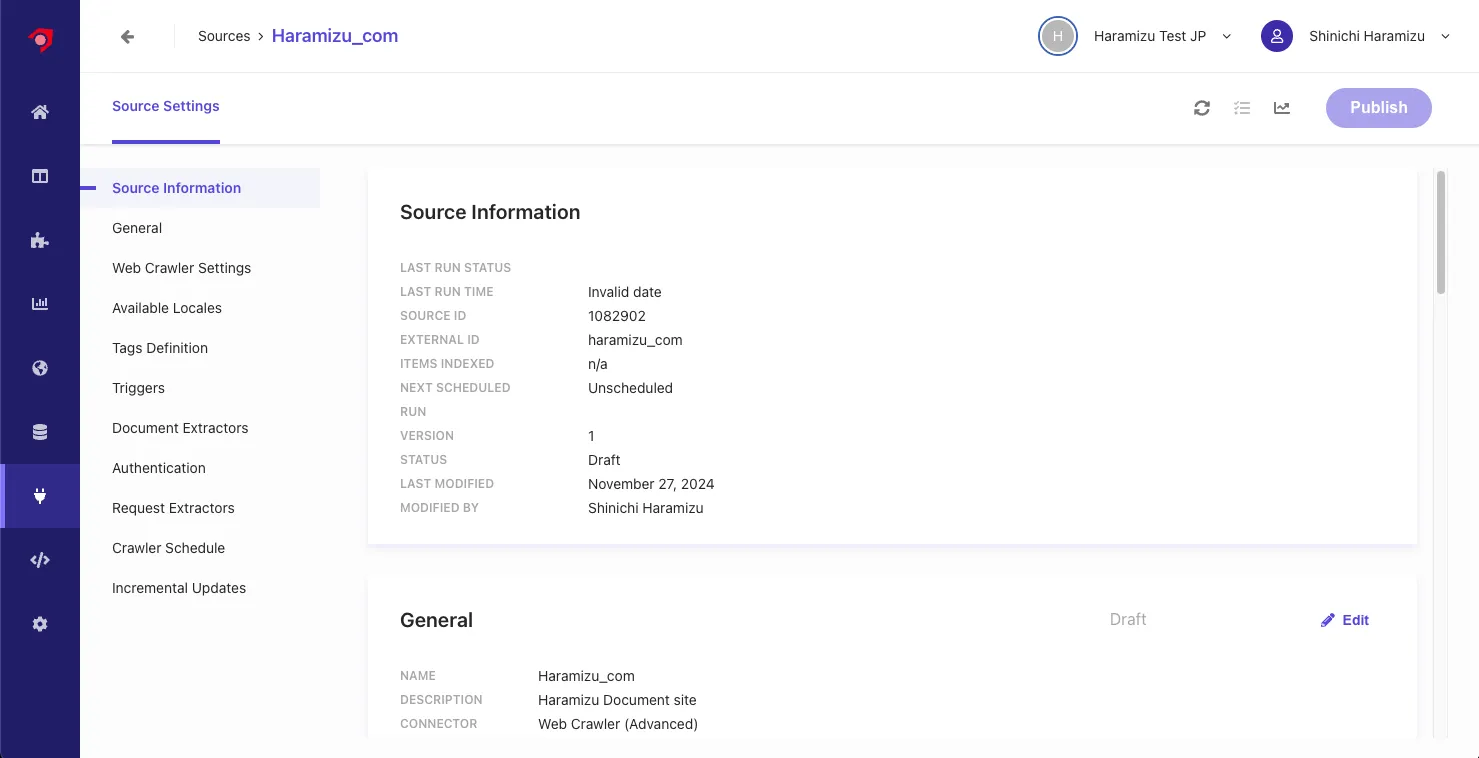
-
In the
Web Crawler Settingssection, configure the following settings:- Allowed domains: Specify the target domains
- Max depth: Specify the depth for crawling links
- Max URLs: Specify the maximum number of URLs to crawl and index
- Exclusion Patterns: Specify URLs to exclude
- Headers: Specify headers for the crawler.
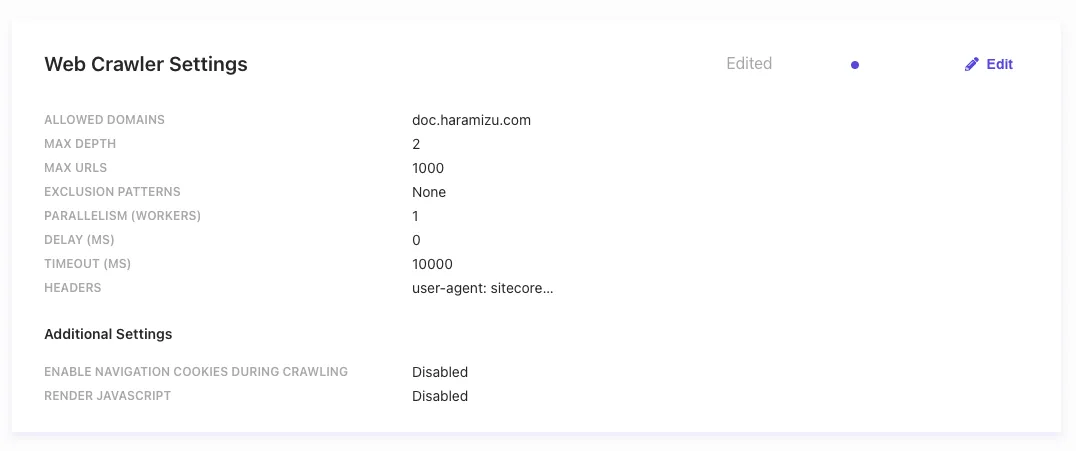
-
Add
Triggers. You can specify JS, RSS, Request, Sitemap, or Sitemap Index. Here, we specified Sitemap Index.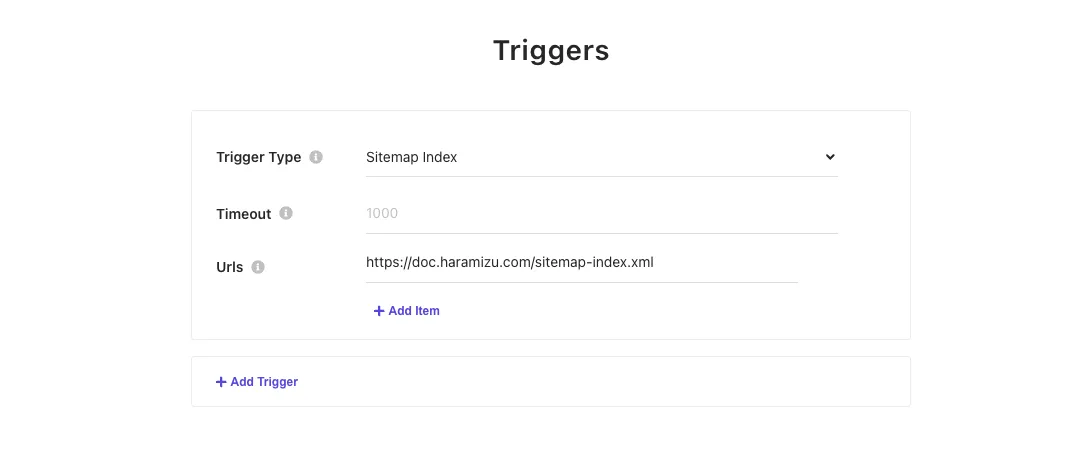
With the above settings, the configuration other than Document Extractor is complete.
Creating a Document Extractor
To crawl the content of a website, the important setting to analyze and index the obtained data is the Document Extractor. By default, an Extractor using XPath is set.
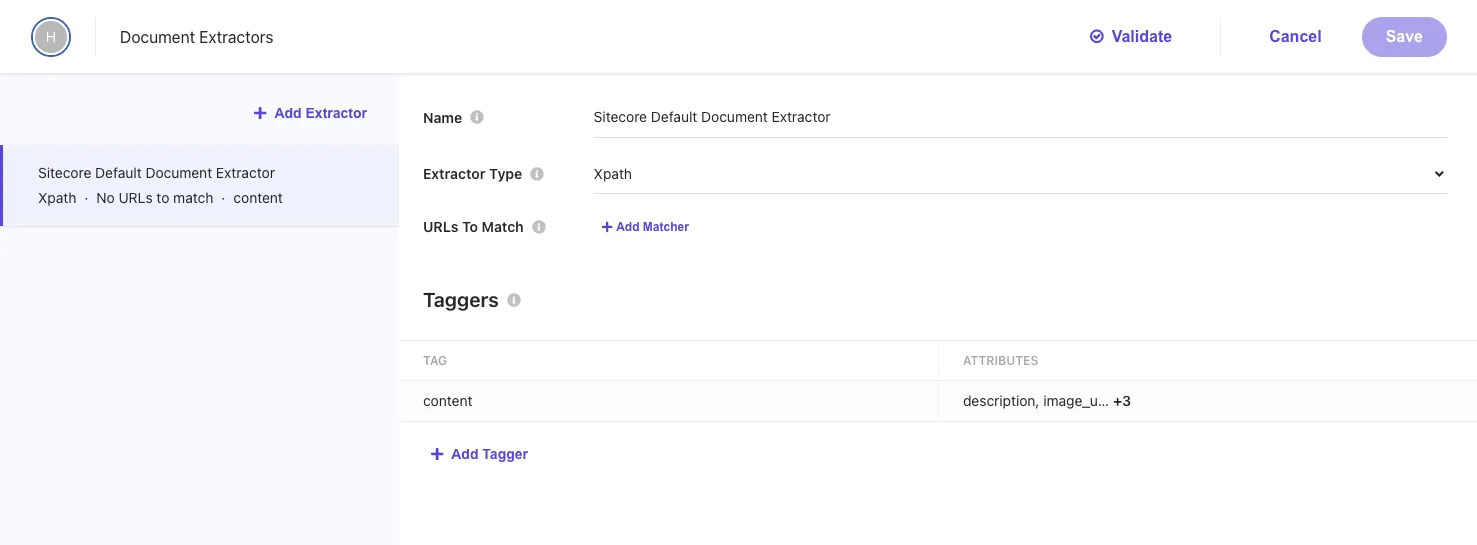
You can specify multiple Extractors for a source. The settings items on the screen above have the following roles:
- Name: Specify a name for the Extractor
- Extractor Type: Choose
CSS,XPath, orJSas the Extractor. We will proceed withXPath. - URLs to Match: Specify the URLs for which the Extractor will be effective. You can specify rules as
Regular Expression,Glob Expression, orJS. We will not specify any this time.
Taggers are used to analyze the content and configure how to index it.
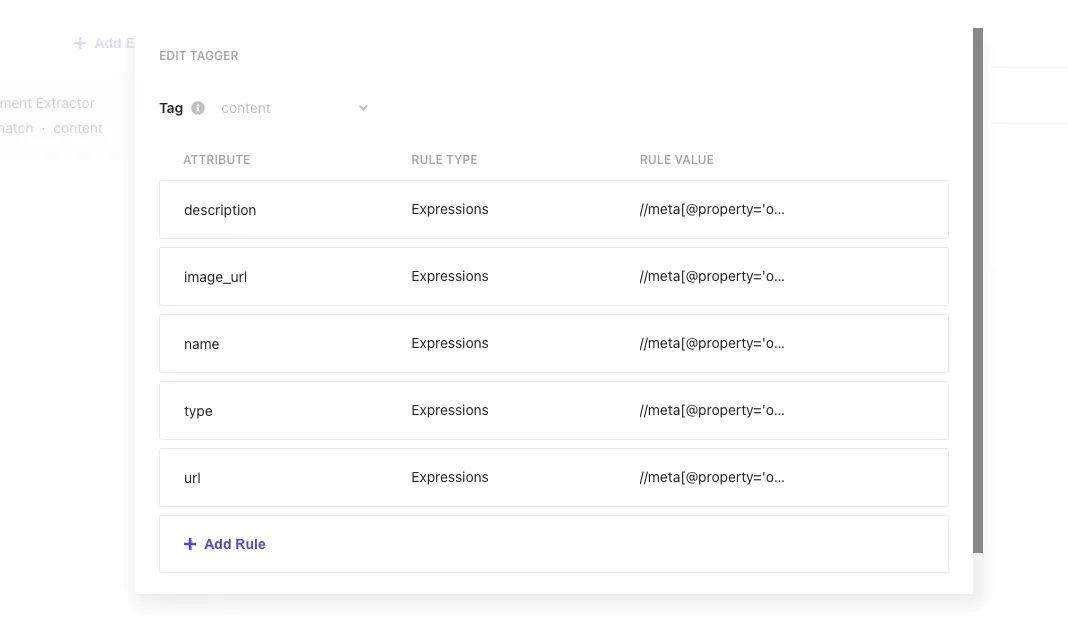
The sample is as follows:
| Attribute | Rule type | Rule Value |
|---|---|---|
| description | Expressions | //meta[@property='og:description']/@content |
| image_url | Expressions | //meta[@property='og:image']/@content |
| name | Expressions | //meta[@property='og:title']/@content |
| type | Expressions | //meta[@property='og:type']/@content |
| type | Expressions | //meta[@property='og:url']/@content |
To check if the values can be obtained when the site is crawled with this setting, click the Validate button at the top of the screen. Specify the URL https://doc.haramizu.com/about/overview/, and the execution result will be displayed as follows.
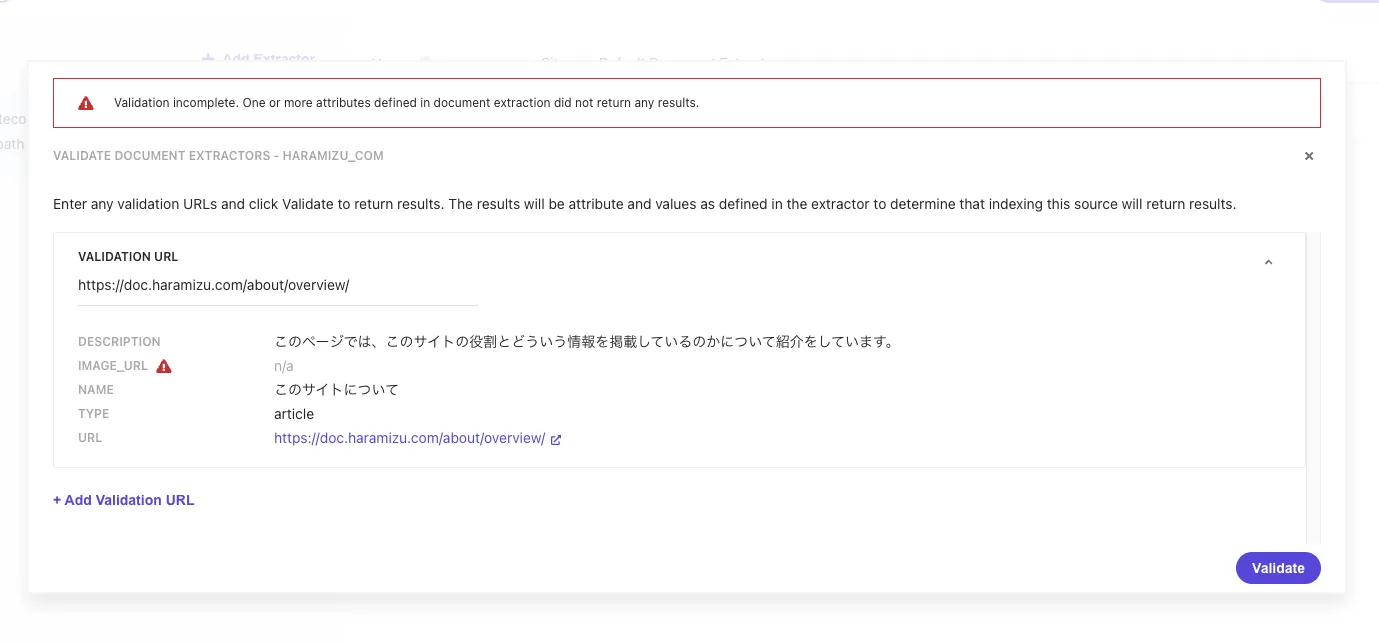
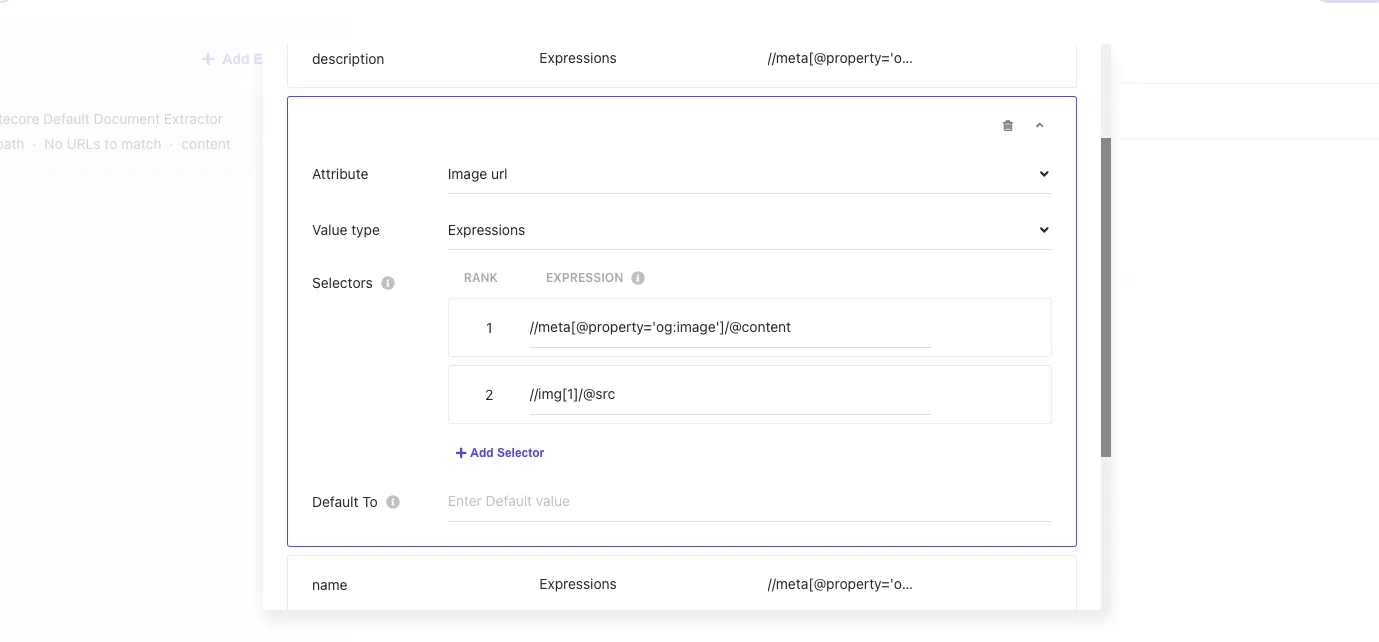
Since this site does not set og:image at the time of introducing this article, it is displayed as blank. Therefore, to specify the first image displayed on the page for image_url, add //img[1]/@src as Rank 2.
Click the Validate button again and specify the URL https://doc.haramizu.com/en/cloud-portal/overview/ which has an image. As a result, the path of the first image on the page was obtained.
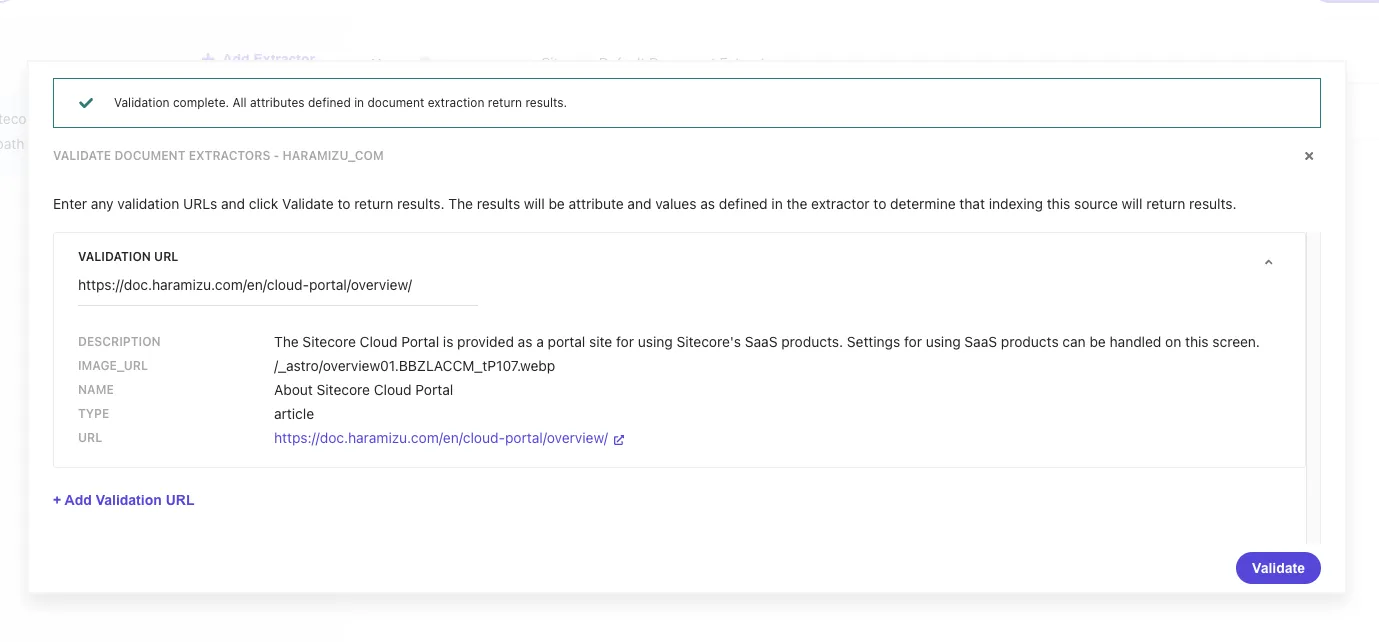
The basic settings of Document Extractor are complete.
Executing the Crawl
With the above settings complete, click the Publish button to execute the crawl.
-
A dialog will be displayed. Check the
Trigger Source Scan After Publishing The Sourcecheckbox to activate the crawler.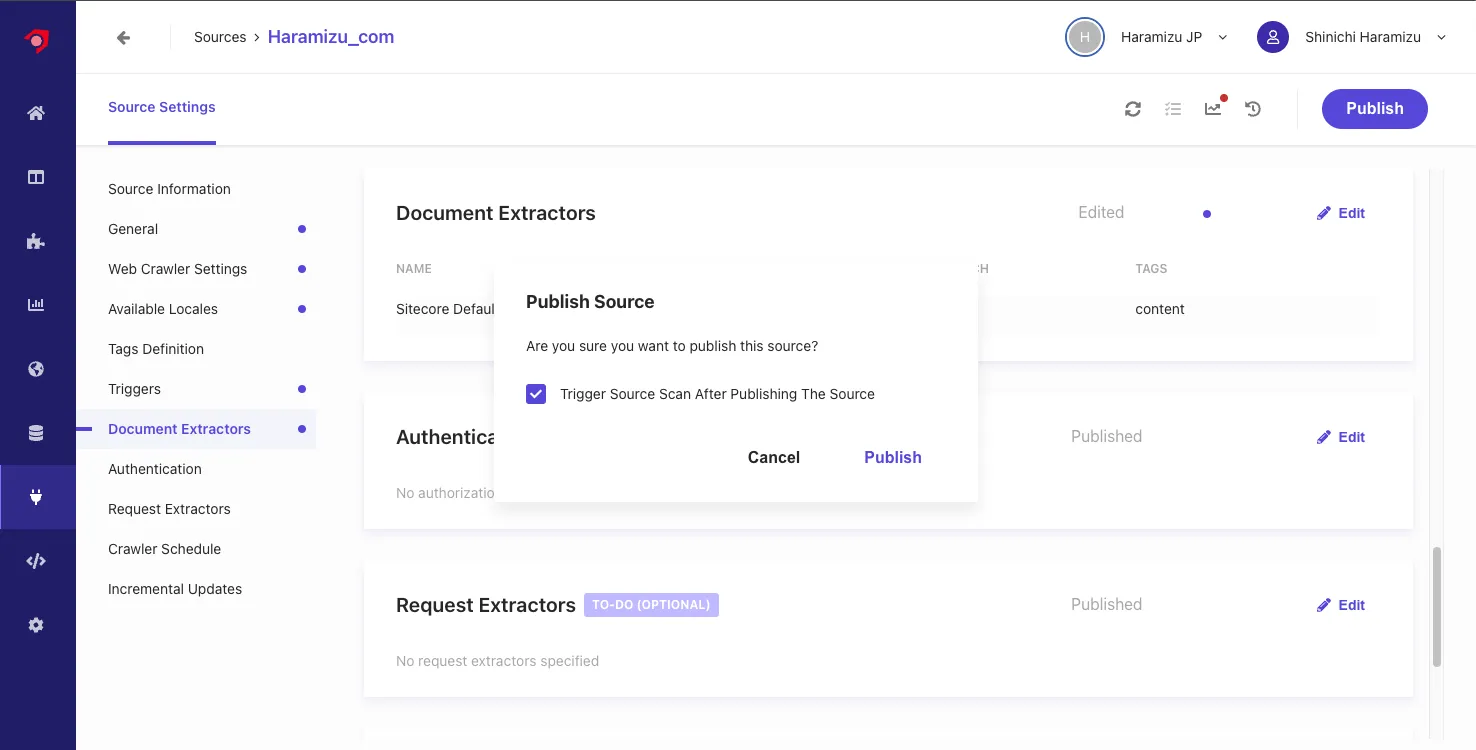
-
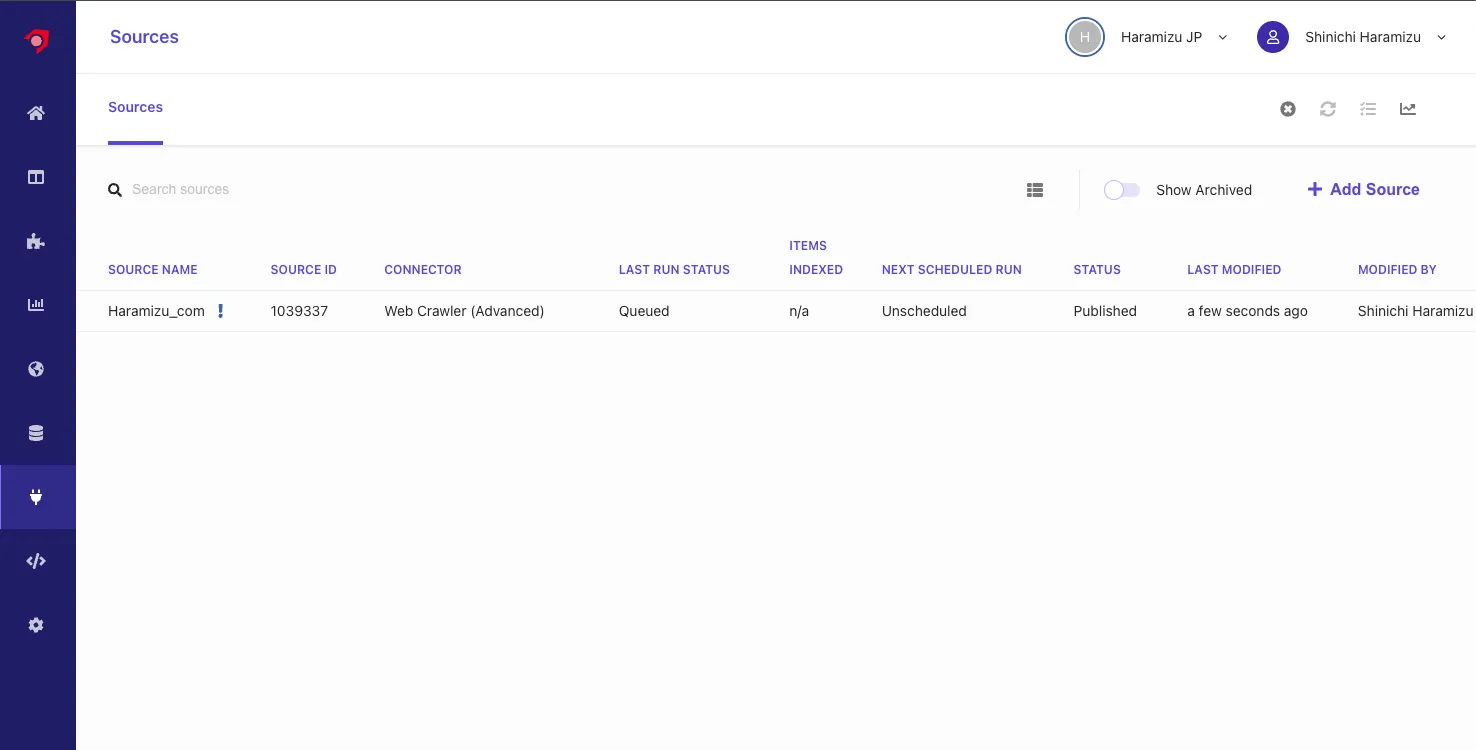
When you refer to the source list page, you can confirm that it is Queued.
-
After a while, the status will change to Running, and the content will be crawled and indexed.
-
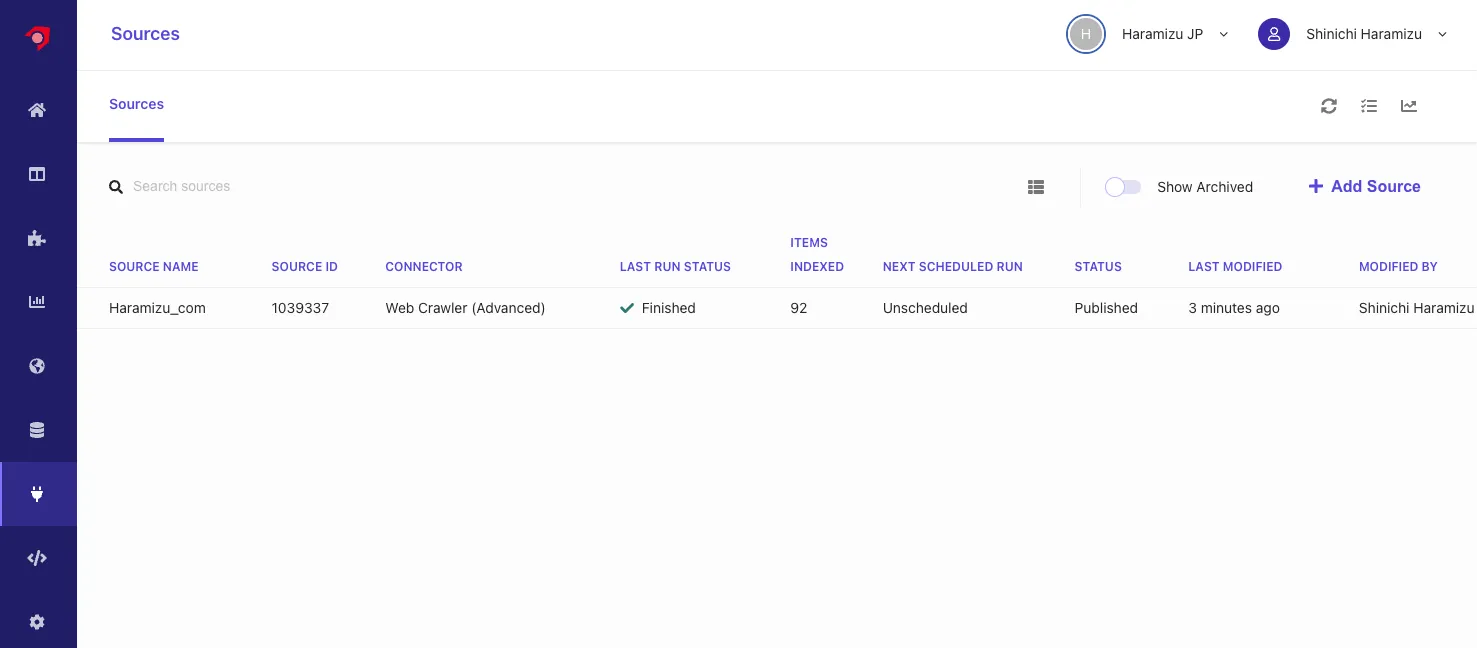
When it becomes Finish, the crawl is complete.
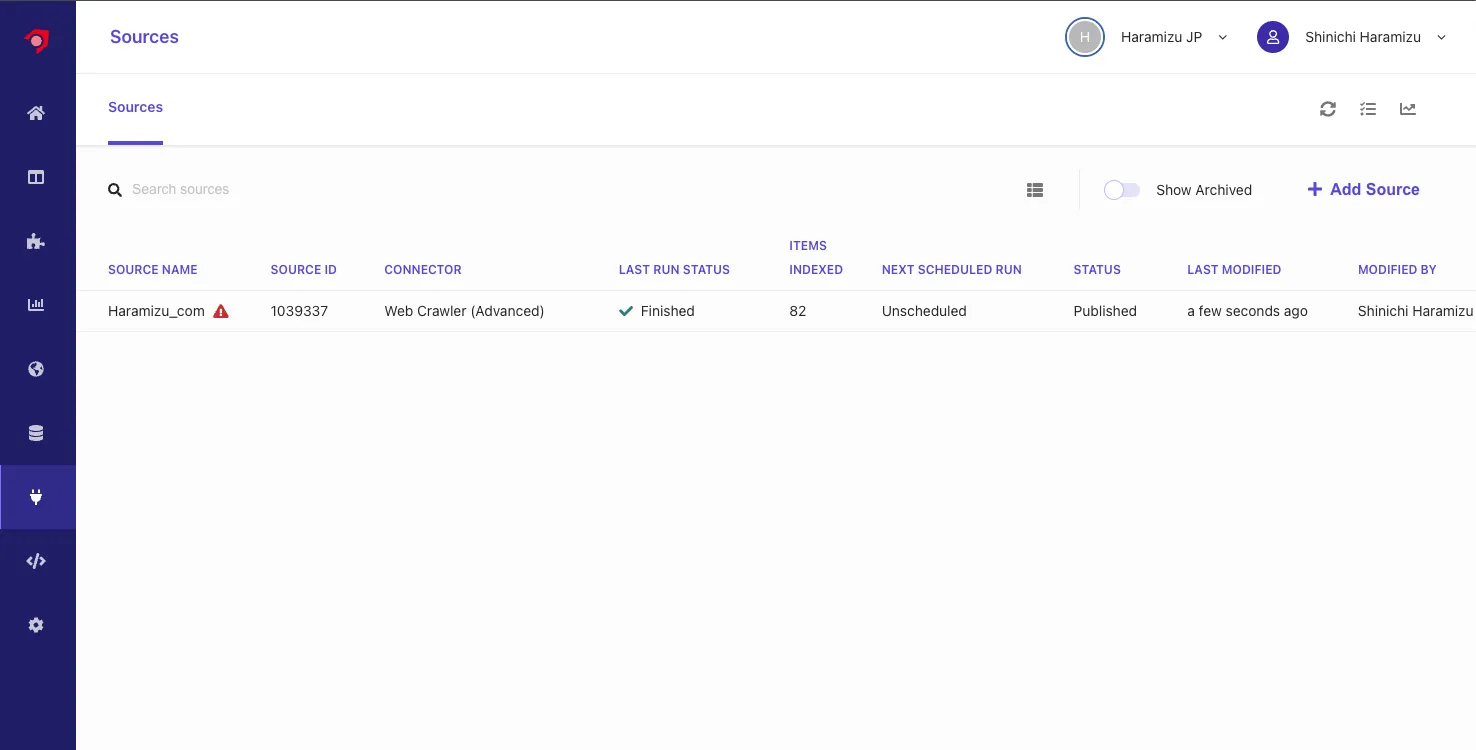
After crawling, it is found that some pages lack required items and result in errors.
Checking the Error Details
To check the crawler errors, open the Analytics screen in the management screen, and open Source - Overview. The source list will be displayed. Specify Haramizu_com to refer to the crawl result report.
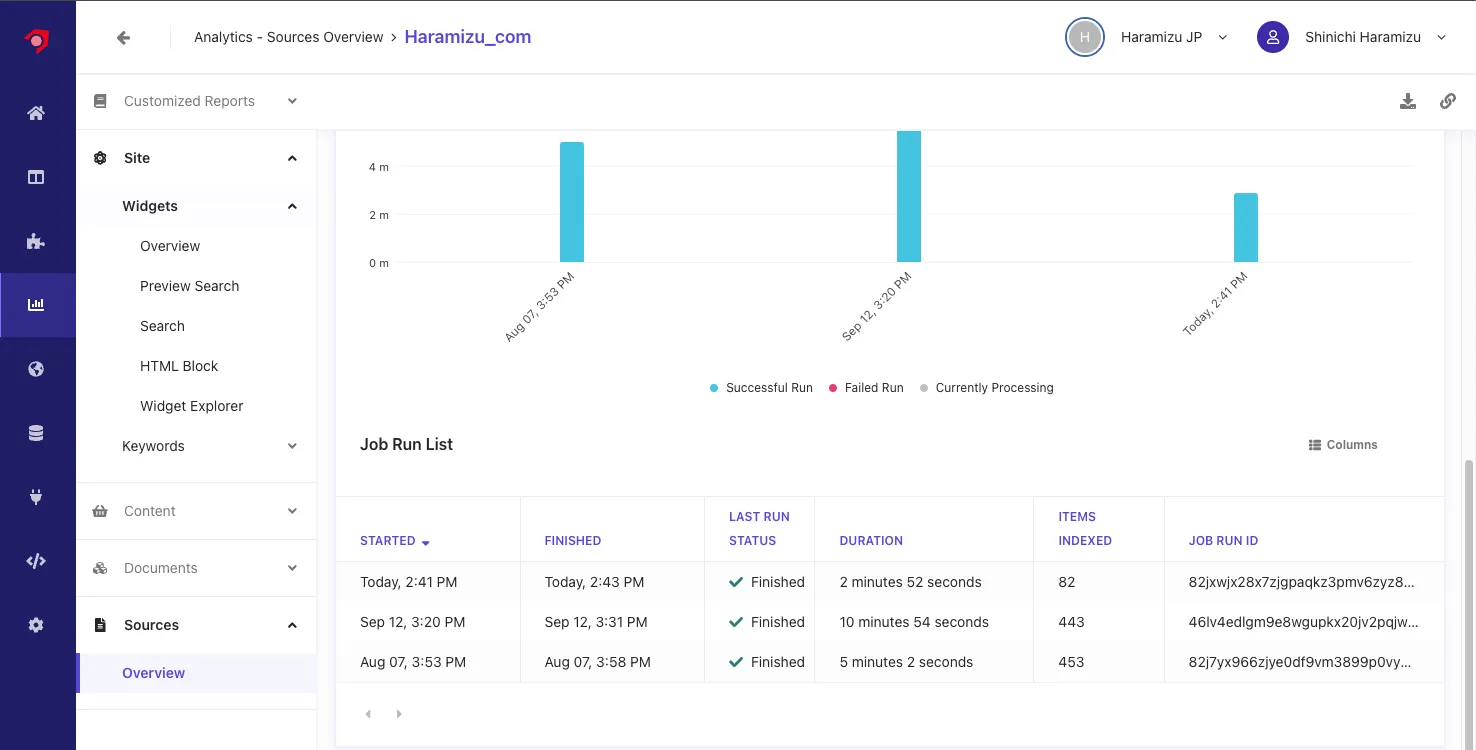
Referring to the latest crawl report, it is found that three items have errors.
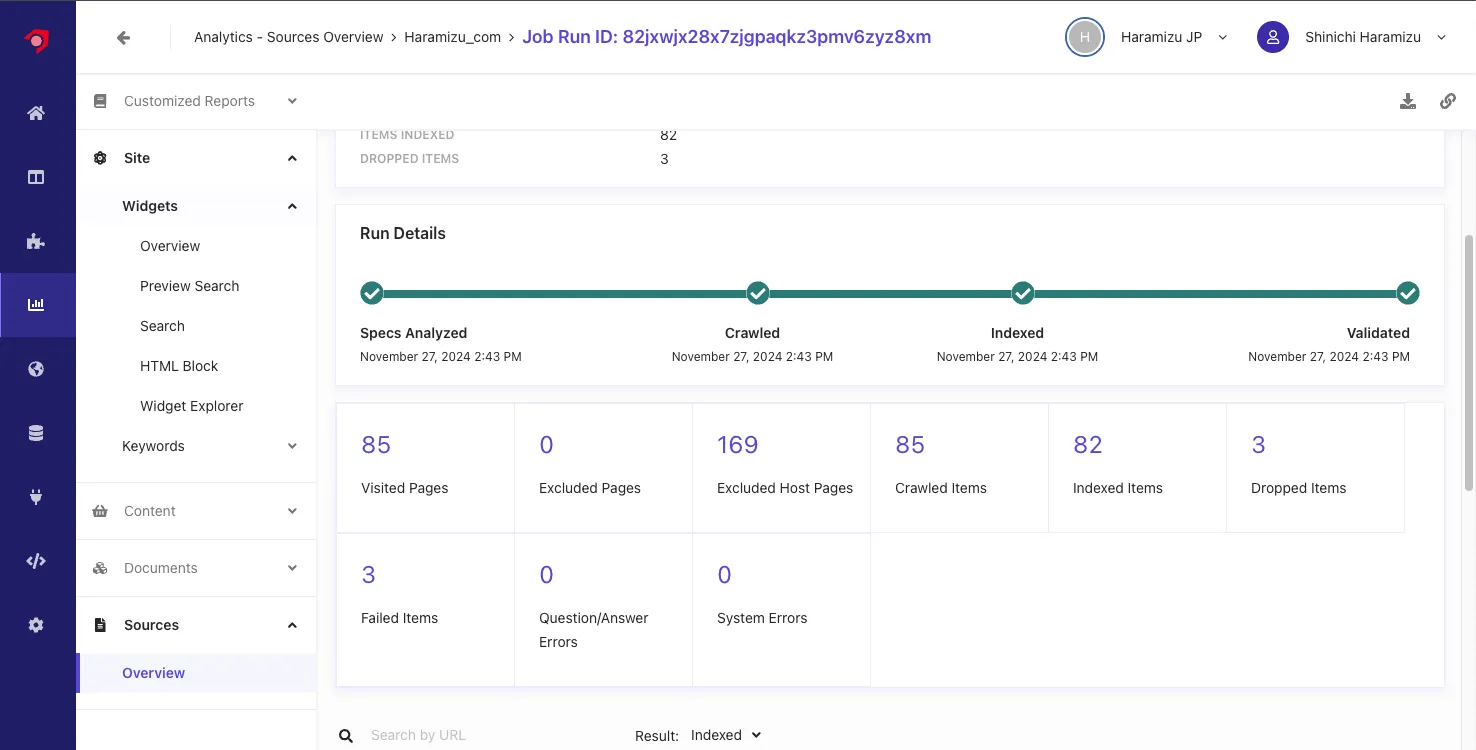
Details can be checked in the Result section by selecting Dropped.
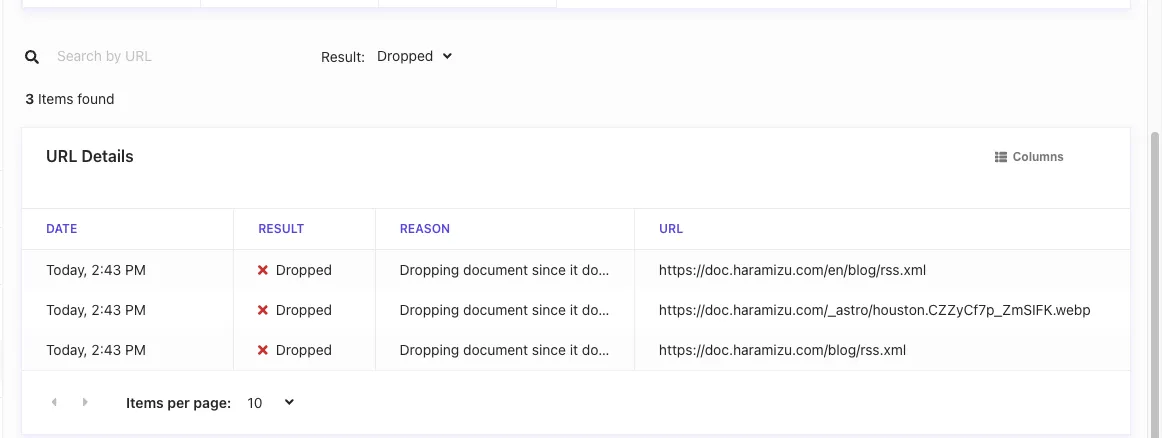
It is found that the errors include images and RSS URLs.
For the image, it is found that the string described as an explanation in the page was judged as a URL and failed to crawl. We will slightly change the page description.
For RSS, we will exclude URLs ending with .xml. This setting is added to Exclusion Patterns in Web Crawler Settings with the regular expression .*\.xml$.
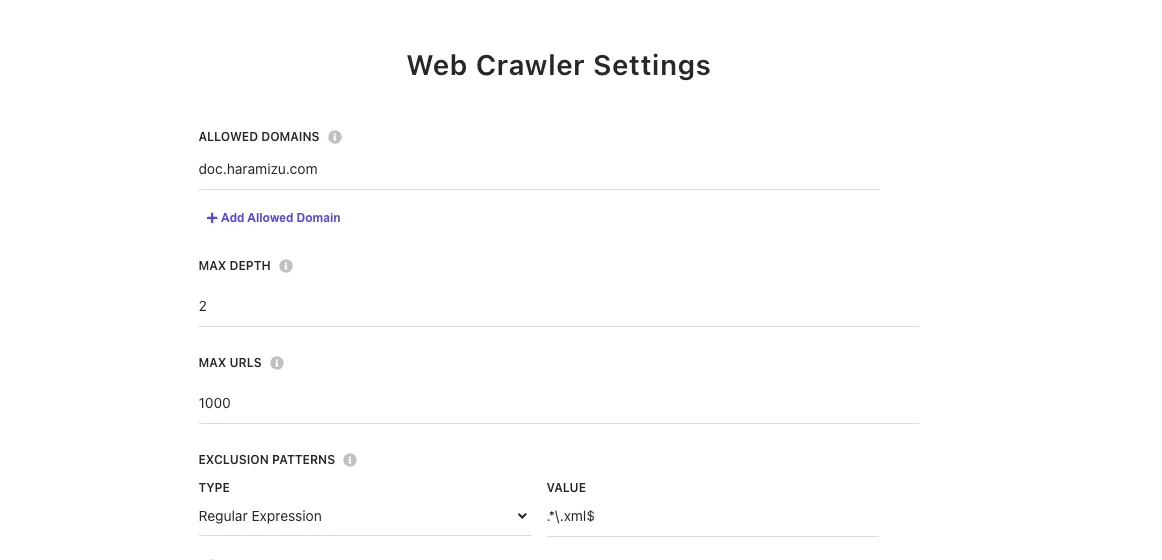
Reflect the settings and execute Publish again to re-crawl. This time, no errors are displayed.
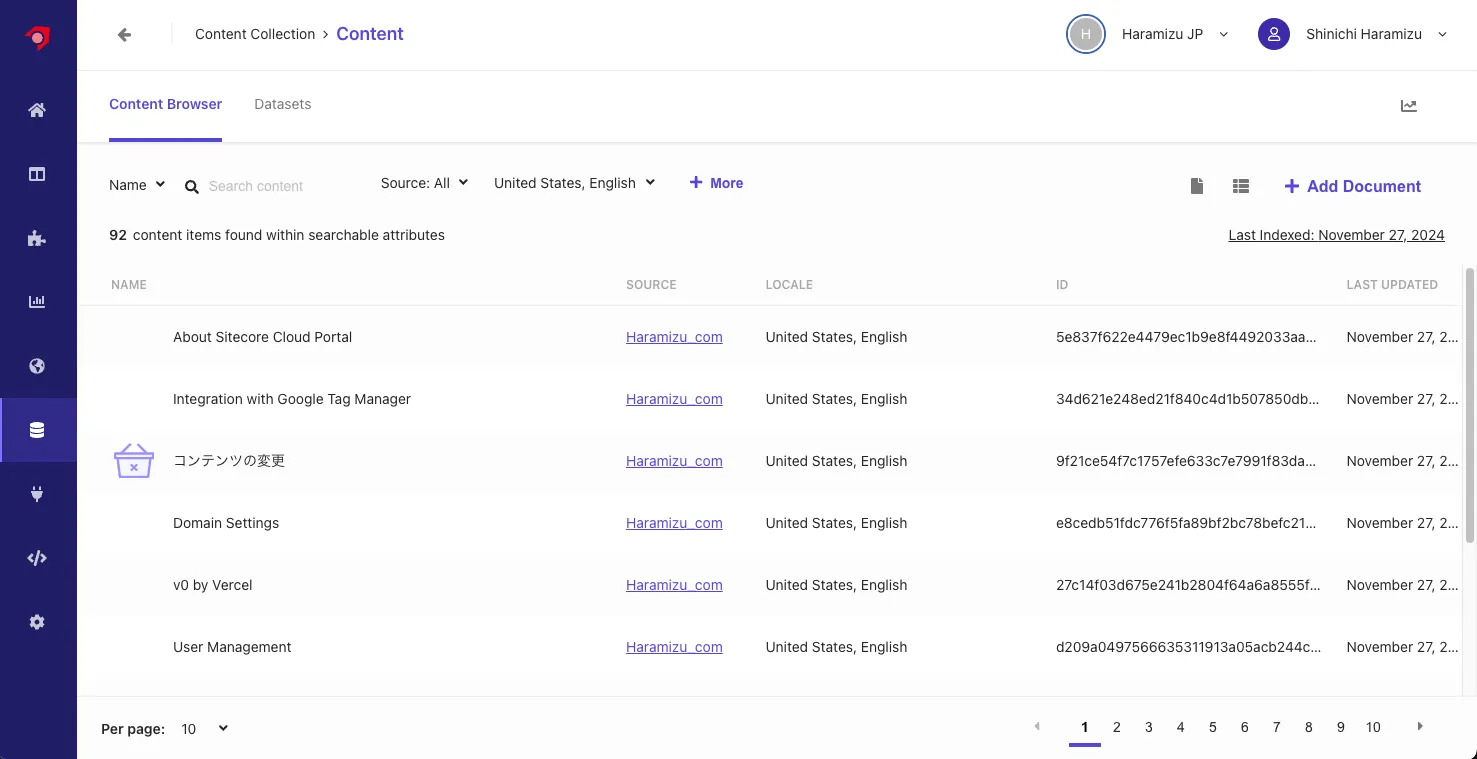
Checking the Content
You can check the crawled content from Content Collection. Below is the screen confirming the content list obtained by the currently used Sitecore Search.
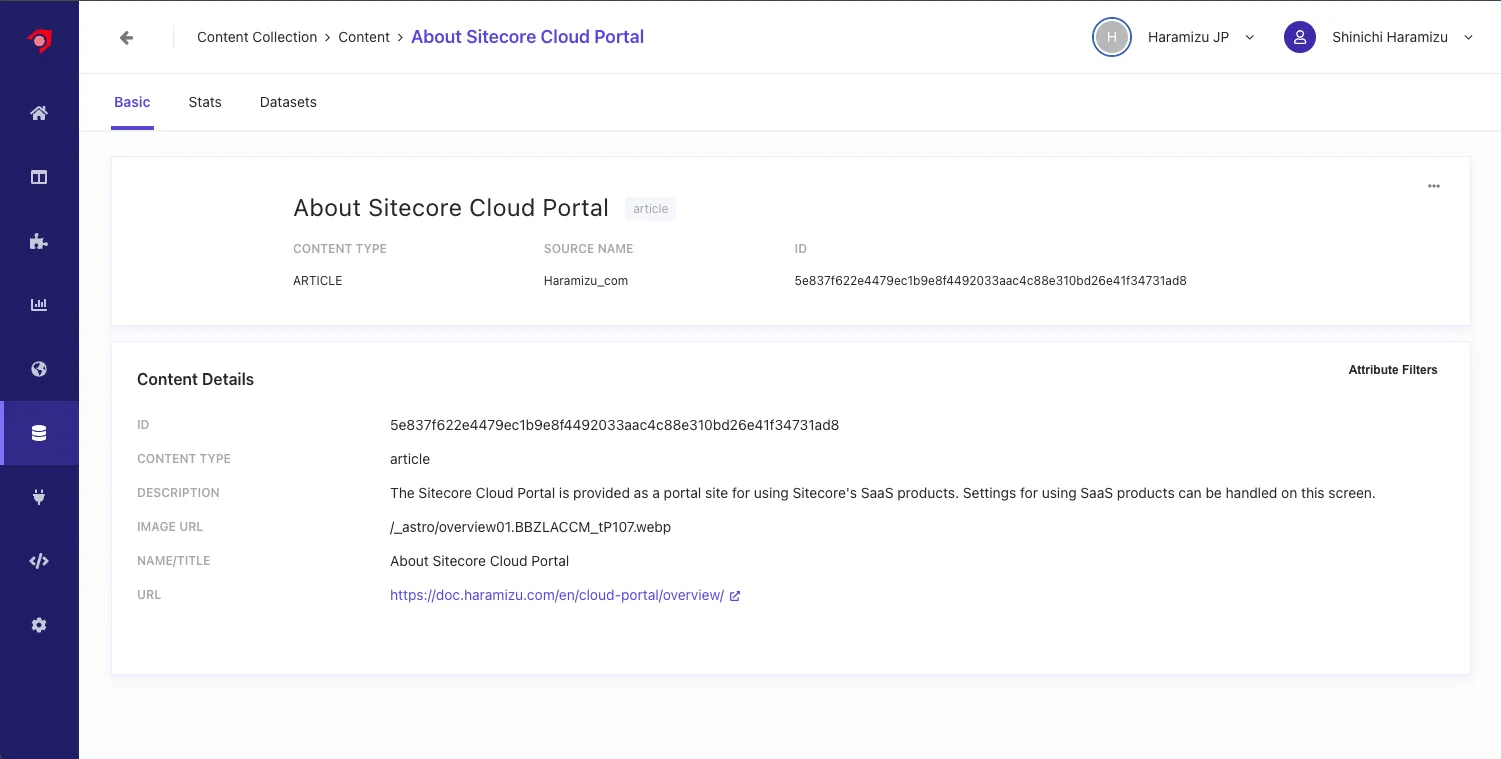
Clicking on specific content allows you to check the data saved for the Attribute.
Summary
To obtain data for search, we used Web Crawler (Advanced) to obtain site content, and managed it as content using XPath for Document Extractor. We also confirmed how to handle errors when they occur, ensuring the crawler works correctly.